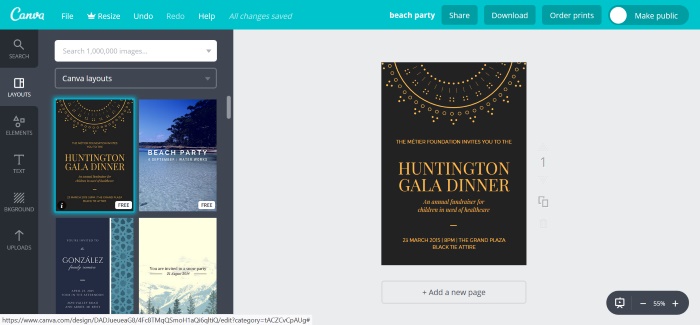
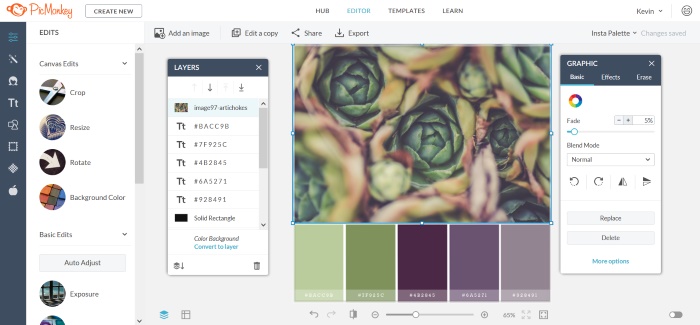
When I decided to compare these two popular online image creation tools, I thought that the tools would be remarkably similar, what I found was that it seems to me that both of these tools are actually designed for different markets entirely.
Canva Vs PicMonkey Comparison Table
| PicMonkey | Canva | |
|---|---|---|
| Price | Basic – $7.99 monthly or $71.88 Annually Pro – $119.98 Annually | Canva for Work $12.95 monthly $119.40 Annually |
| Storage | Basic – 1 GB Pro – Unlimited | Unlimited |
| Stock Photos | None | Yes |
| Graphics and Illustrations | Many | Over 300,000 |
| Templates | Yes | Yes |
| Best For | Fast Image Editing | Fast Graphics Creation |
| Link: | PicMonkey | Canva |
Canva vs PicMonkey, Which Graphic Design Tool is Right for You?
Both of these editors have their place, and when deciding which one to use, you really need to be thinking about your needs.
If you were a social media marketer that needed a tool to create infographics to post to your social media accounts, Canva is likely a better fit since it has an extensive library of graphics and stock photos that you can easily search.
The tool is simple enough so that you can quickly create quality images, but it does lack a lot of advanced features that would be nice to have. You likely don’t want to spend too much time creating these images since you are just going to post them and basically “throw them away” after that.
One area I could see PicMonkey really standing out is for people who take a lot of their own photos for e-commerce sites or Instagram. The ability to be able to edit and quickly retouch photos without having super complicated software is extremely useful. It’s slightly more difficult to use than Canva but it’s nothing like working with Adobe Photoshop, which can take years for people to master.
I have personally used PS in the past, I don’t consider myself to be an expert or anything, but I found Canva to be a little bit too unsophisticated for creating things like ads or doing things like editing screenshots.
With both Canva and PicMonkey, you can not export an image without first flattening it (combining the layers into one), and in the situations where I felt that Canva was too limited, I ended up exporting the image into a different tool.
If you are a blogger or a content marketer and want to optimize your images correctly, unfortunately, you’re going to have to find a separate tool to do that, but that’s probably not a big deal to most people. There are free desktop tools and online websites that will compress jpg images and, in many cases, png file sizes are often small enough anyway, and it’s not worth the loss of quality for graphics.
The main take away to remember is that Canva is more focused on creating simple graphics and PicMonkey seems to shine when it comes to doing simple photo editing and retouching.
Both tools are designed with speed and ease of use in mind and do not replace professional grade software such as Adobe Photoshop or Adobe Illustrator. Most people need to get extensive training to be able to use Adobe products, whereas most people should be able to figure out Canva and PicMonkey without too much trouble.
Canva Pros

The free version of Canva is actually quite useful and provides access to many free layouts, elements, fonts, backgrounds, photos, and illustrations.
Being able to use the tool, granted a limited version of the paid tool, is extremely nice and is Canva’s biggest pro.
You can buy more images for just 1$ each that you can easily find by using the search feature. You can alternatively sign up for the premium version and get access to an additional 300,000 images.
It’s also the absolute easiest image editing tool that I’ve ever personally used, but with that said, that’s because they’ve removed many features that you would expect image editing software to have. I’ll count that as a pro since I understand that people who want to use Canva are likely to be people who have minimal experience working with image manipulation software.
When working with the filters, you can copy the filter code. This allows you to “save the filter” by copy and pasting the code into something like a notepad file. It’s very useful if you have a ton of images that you want to apply the same filter on.
Canva Cons
The editor does allow you to layer images and text on top of each other, but there is, unfortunately, no layers control. You actually have to select each element and adjust it by pressing the arrange button. This isn’t that big of a deal, but once you have a bunch of elements stacked on top of each other, it can become difficult to select the element that you want to bring to the top layer or tweak its options.
More than once I was forced to move a bunch of elements that I had positioned carefully out of the way so that I could select an element that was on the bottom of the “pile.” It seemed to work perfectly fine with most elements, but I had a lot of trouble with the grids and large background images, but If I placed these elements first, then I didn’t have any issues.
You cannot export png files with transparent backgrounds unless you pay. I know they have to throw in some limitations, or there’s no reason for anyone to pay for the tool, but I personally think that was a poor way to limit their software. I can just export the image with a solid color background and in most cases that will work just fine.
You can’t use custom fonts with the free version, which is perfectly fine if you are creating images that you are going to post to your social media accounts, but if your site has a consistent font that you use, you will have to pay for the software if you feel that the fonts must match perfectly.
There is no way to tune the compression level of jpg images. This would be a pretty big issue for me personally if I wanted to use an “easy designer,” that is one advanced feature that it really needs to have. Having to open the design in a separate tool just to compress the image to a sane file size, almost defeats the purpose of using this tool for me.
The way you add gradients in Canva isn’t very straightforward. You have to search for a gradient, which is actually an image of one, then add it to your canvas. This works, but I’m used to being able to fill an element with a color gradient in other tools rather than adding an element that is a gradient. I don’t want to say that it’s impossible, but I think it would be challenging to create complex elements, such as text, that was filled with a gradient.
I was also getting pretty frustrated at one point that you could not override elements snapping to the grid. This happens a lot when you are trying to move elements near the edge of your canvas, it automatically snaps to the edge when you get close. You can override the snapping by holding the shift key, which is odd because it’s usually the control or alt key in most other applications.
I couldn’t find any help on Canva’s site about this issue, and I even searched “shift” after figuring it out, I checked all the results in the help section, and it’s not mentioned anywhere. You can alternatively get the element close to where you want it and use the arrow keys to move it one pixel at a time, that is mentioned.
PicMonkey Pros

It’s almost like a web-based version of Adobe Photoshop. If you ever tried Photoshop, you know that it’s super powerful, but it’s almost too powerful, and the sheer volume of options and controls is dizzying. There’s just so many options that honestly only really advanced users know how to use. With PicMonkey, you get much of the functionality that is frequently used, without all of the extra stuff. This isn’t a comparison article on PicMonkey vs. Photoshop, and I honestly don’t think that it’s a fair comparison, but for most bloggers and social media marketers, this tool is excellent.
Since PicMonkey is designed to be a little bit more advanced, there are tons of tutorials on their website that are extremely helpful.
One of the better things about PicMonkey is that the basic plan costs less than the paid version of Canva. There is a free trial for PicMonkey as well.
Photo editing and manipulate is possible and not just basic graphic design. There are layers, effects, blending modes, and a bunch of “paintable” adjustments that are specifically designed to retouch photos and portraits. You can easily use simple effects like shadows to create things like 3D buttons. As an example, this image of a button took me about 1 minute to create, note: it’s not clickable.

There is a large selection of templates, shapes, icons, templates, frames, and mockups.
PicMonkey Cons
There’s only a free trial, you will have to pay monthly or annually to use the software.
There is an option to select jpg image compression, but you only get 3 quality options, low, medium, and high. It does tell you what the file size of the image is going to be, but it would be really nice if there were a bit more granularity, I really wish there was at least a slider with 10 or so levels.
There’s no paintbrush. You would think that with everything else that PicMonkey has to offer, there would be a way to paint with colors and not just effects. There is a way where you can sort of paint by using the tint effect, but it’s not ideal. Obviously, painting isn’t what PicMonkey was designed to do, but it would still be nice if you could.
It’s easy enough to find shapes and icons in the navigation menu, but you can’t search the images.
The stock image selection is extremely limited to only the images that are in the templates, and you will have to use a different website to find stock photos for your designs. I really don’t think that would be that big of a deal since you would most likely be uploading your own photos.
Default Templates:
Another thing to think about is whether or not the software is going to have all of the default templates you need. Now you can always create your own images from any dimensions you desire, in either inches or pixels. One thing that’s strange is that only Canva has a Millimeters option, which isn’t a big deal since the vast majority of people are going to use pixels anyways.
One thing I noticed is that Canva seems to have more options for creating images that would get printed onto media.